Archive for the ‘News & Updates’ Category

Deworming: Plan, Purge, Protect

Monday, July 15th, 2024

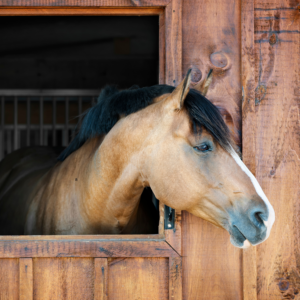
Deworming: Plan, Purge, Protect. Tan horse looking out of a barn stall.Internal parasites are a common problem in horses, particularly those managed on pasture. In addition to being a nuisance, internal parasites can cause serious health problems. These health issues include conditions such as weight loss, poor performance, colic, and intestinal obstruction. Establishing and maintaining a routine deworming schedule for your horses is an essential step to keep them healthy. However, a good deworming program should be tailored to the individual horse. The program should be based on factors such as age, pasture type, climate, and management style. Strategic deworming takes these factors into account. Additionally, a good deworming strategy helps prevent the development of resistance and strives to keep the deworming medications you use on your farm effective.

Strategic Deworming for Horses

In the past, deworming horses often meant giving a broad spectrum deworming medication to every horse in the barn a few times each year. Nowadays, it is recommended that horse owners use a strategic deworming program that addresses the needs of each individual horse. A strategic deworming protocol involves three steps:

Plan

Planning is perhaps the most important step in any strategic deworming program. To start, your veterinarian can help you monitor fecal egg count for the horses on your farm. This easy testing will identify high, moderate, and low egg shedders, and this information will be used to determine the frequency of deworming needed for each horse. In addition to fecal egg counting, you will also need to understand the types of parasites that are prevalent in your region and their infection cycles. This will help you make informed decisions regarding your horse’s management and the types of deworming medications available to target these species.

Purge

Purging involves the use of a broad spectrum deworming medication such as ivermectin to interrupt the infection cycle and kill the parasites that are currently established in your horse. Purge dewormers like Farnam IverCare (ivermectin) Paste 1.87% target a wide variety of parasites including small and large strongyles, pinworms, ascarids, and bots in a single dose. This medication is easy to administer using the adjustable dosing syringe. The frequency of purge deworming should be customized to fit the needs of the individual horse. High egg shedders may need more frequent purges, while low egg shedders may only need a purge dewormer twice per year. Monitoring fecal egg counts before and after the use of purge dewormers can also be useful to identify resistant parasites and ensure the deworming medication you have chosen is effective.

Protect

Daily deworming medications such as Farnam PyrantelCare Daily Dewormer 2.11% (pyrantel tartrate) provides continuous protection against more than 31 of the most common species and stages of equine parasites. This product utilizes pyrantel tartrate, a safe and effective anthelmintic that targets large and small strongyles, pinworms, and ascarids. The palatable medicated pellets are simply added to the horse’s normal feed daily. Once ingested, the medication works in the horse’s digestive tract to control parasites and help to prevent parasites from migrating through your horse’s digestive system, which can cause serious damage. While daily dewormers are a great tool for controlling new parasite infections, they do not treat all stages of parasites. That’s why it is important to use these products in conjunction with a routine purge deworming plan.

Summary

There are many different deworming products on the market today. Choosing the best options for your horse can seem daunting. While there is no “one-size-fits-all” approach to equine deworming, a strategic deworming program is easy to implement. It will also provide your horse with protection to meet his unique needs. With the right products and a customized approach, you can have peace of mind knowing that you are doing what you can to help your horse remain healthy and protected from parasites.

Elizabeth Racine

Original article from Farnam.

How to Switch to a Chicken Layer Feed

Wednesday, July 3rd, 2024

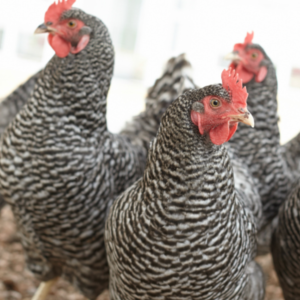
Switch to Chicken Layer FeedSwitch laying hens to a complete chicken layer feed when they start laying eggs around 18 weeks of age. Choose a complete layer feed that includes all the essential nutrients laying hens need to lay strong and stay strong. Then make the transition gradually over one week.
When you turn 18, you can do a lot of new things. You can vote, buy fireworks and even try your luck with the lottery. The magical number means welcome to adulthood.

For backyard chickens, the number 18 means the same thing. Eighteen weeks is the age when laying hens are considered adults. Most excitingly, it’s the time when many chicken breeds will start laying eggs. At this key milestone, switch your hens to a complete layer feed.

This feed switch is an essential step down the road to farm fresh eggs because hens require different nutrients to produce eggs as compared to when they are growing.

To produce an egg each day, hens need high levels of calcium, vitamins and minerals. Hens transfer many of these nutrients directly into their eggs, so the nutrients in layer feed play an essential role in egg production.

Consider the following steps when transitioning to a complete chicken layer feed:

1. Choose a chicken layer feed that matches your goals.

The best chicken feed for layers depends on your flock goals. Select a complete layer feed before the transition begins. Ideally, make your layer feed decision by week 16, so you’re ready to make the transition at week 18.

First, look for a complete layer feed. This means the feed should be formulated to provide all the nutrients laying hens require without a need to supplement. Choose a layer feed with the Purina® Oyster Strong® System to help your hens lay strong and stay strong.

Which layer feed Oyster Strong® System is right for your flock?

  • Purina® Layena® pellets or crumbles Our most popular layer feeds
  • Purina® Layena® Omega-3 Includes added omega-3 fatty acids for your health
  • Purina® Layena® High Protein Includes 19% protein and black fly soldier fly larvae
  • Purina® Organic Layer Feed Certified USDA Organic

Each of these chicken layer feeds is made with simple, wholesome ingredients, 16 percent protein, at least 3.25 percent calcium as well as key vitamins and minerals. They also include our exclusive Oyster Strong® System to ensure your laying hens achieve a balanced supply of calcium through a blend of oyster shell, vitamin D and manganese. These three ingredients work together to help your chickens produce strong-shelled, delicious eggs each day.

These are just the essentials, though. Additional ingredients in Purina® complete layer feeds help bring hen health and egg quality to the next level.

A few next-level ingredients to look for include:

  • For rich, yellow yolks: Marigold extract
  • For strong shells and healthy hens: Oyster Strong® System
  • For immune and digestive health: Prebiotics and probiotics
  • For vibrant feathering: Essential amino acids such as lysine and methionine
  • For omega-rich eggs: Added omega-3 fatty acids

2. Transition to chicken layer feed over one week.

When birds reach 18 weeks old or when the first egg arrives, gradually switch your laying hens to a complete layer feed. It’s important to make the transition over time to prevent digestive upset.

On our farm in Missouri, we’ve found it’s best to make chicken feed transitions over time rather than all at once. We mix the starter-grower feed and layer feed evenly for four or five days. If birds are used to crumbles, start with a crumble layer feed. The same goes with pellets. The more similar the two chicken feeds are, the more smoothly the transition will go.

Many hens will eat the mixed feed without noticing a difference. When laying hens are eating both feeds, you can stop feeding the starter-grower feed and make the complete switch to all layer feed. It is important to give your birds enough time to adjust to the new diet. Most birds will adjust within a couple days but some can take a couple weeks to fully transition to their new diet.

3. Keep chicken feed consistent.

Once the transition to layer feed is complete, it’s best to maintain a routine.

We recommend providing free choice layer feed to hens and switching out the feed each morning and evening. Laying hens eat approximately 0.25 pounds of complete feed each day, equaling about one-half cup.

If birds are free-ranging, offer complete layer feed before they go out in the morning. This will help them consume the essential nutrients before filling up on less nutritionally balanced insects and plants.

It’s important for the complete feed to make up at least 90 percent of the hen’s diet. We feed complete layer feeds on our farm because they are formulated to provide all the nutrients hens require at the correct levels. It’s reassuring to know that each bite of feed is balanced to keep our hens healthy and producing quality eggs.

Ready to start the transition? Visit our store today to pick up a bag that meets your flock’s needs.

From Purina. Patrick Briggs.

Ultimate Guide to Summer Gardening

Tuesday, June 18th, 2024

Summer Gardening, Planting FlowersWith the warmth of summer on the horizon, it’s time to prepare your garden for the vibrant season ahead. Transitioning your garden to handle the hot summer months is an essential task for every gardener. This shift not only involves adapting your garden to the changing weather but also ensuring that your plants thrive during the summer months. Here’s our comprehensive guide to help you seamlessly transition your garden and make the most out of the summer bloom.

1. Assessment and Tidying Up

The first step in transitioning your garden is to assess the current state of your plants and garden space. Spring, with its unpredictable weather, can leave some plants in need of care. Remove any dead or diseased foliage and weeds that have taken advantage of the spring growth spurt. This cleanup will reduce competition for nutrients and light, essential for your plants’ growth in summer.

2. Soil Care

Summer brings its own set of challenges for soil health, including potential dryness and nutrient depletion. It’s crucial to prepare your soil for these conditions. Begin by testing your soil to determine its pH and nutrient levels; this will guide you on what amendments your garden might need. Incorporating organic matter like compost can improve soil structure, moisture retention, and nutrient content, creating an ideal environment for plant roots during the hot months.

3. Watering Wisely

Watering practices need to be adjusted as temperatures rise. Early morning is the best time to water your garden, as it allows moisture to reach the roots before the heat of the day causes evaporation. Consider installing a drip irrigation system or soaker hoses for efficient watering. Mulching around plants can also help retain soil moisture and reduce water loss.

4. Choosing the Right Plants

Not all plants thrive in the heat of summer, so it’s important to select the right varieties for your garden. Opt for heat-tolerant and drought-resistant plants that can withstand the summer conditions. Some popular choices include zinnias, marigolds, petunias, and sunflowers for flowers, and tomatoes, peppers, cucumbers, and squash for vegetables. You can also always ask your local feed store (like us!) for suggestions.

5. Pest and Disease Management

Summer can bring about an increase in pests and diseases. Monitor your garden regularly for signs of trouble and take action promptly. Using organic pest control methods, such as introducing beneficial insects or applying neem oil, can effectively manage pests without harming your garden’s ecosystem.

6. Fertilizing for Summer Growth

Your plants will need extra nutrients to sustain growth throughout the summer. Apply a balanced, slow-release fertilizer to provide a steady supply of essential nutrients. Be cautious not to over-fertilize, as this can lead to lush foliage at the expense of flowers and fruits.

7. Pruning and Deadheading

Pruning and deadheading are essential practices to encourage healthy growth and blooming. Remove spent flowers to promote continuous blooming in flowering plants. Pruning can also help shape your plants and improve air circulation, reducing the risk of fungal diseases common in the humid summer months.

8. Providing Shade and Support

Some plants may need protection from the intense summer sun. Utilize shade cloths or plant taller crops strategically to provide natural shade to more sensitive plants. Additionally, ensure that tall plants and climbers have the necessary support, such as stakes or trellises, to withstand summer storms and winds.

9. Enjoying Your Garden

Amidst all the care and maintenance, don’t forget to take time to enjoy the fruits of your labor. Set up a comfortable seating area in your garden to relax and admire the beauty you’ve cultivated. Summer evenings in the garden can offer a delightful retreat from the day’s heat.

Transitioning your garden from spring to summer requires attention to detail and a bit of preparation, but the rewards are well worth the effort. By following these steps, you can ensure that your garden remains a vibrant, flourishing oasis throughout the summer months. Whether you’re a seasoned gardener or a beginner, these tips will help you create a summer garden that brings joy and color to your outdoor space.

How to Keep Horses Cool in Hot Weather

Tuesday, June 18th, 2024

How to Keep Horses Cool in Hot WeatherHow to keep horses cool in hot weather? As summer drags on, heat can become a serious problem for many horses.
Sweating is the primary way horses cool themselves. Experts believe that prolonged, consistently high sweat rates can lead to “exhaustion” of the sweat glands. In horses, this may result in anhidrosis, or the inability to produce sweat adequately. It is crucial to address anhidrosis and find other ways to keep horses cool because it can pose a serious health risk to horses in warm climates.

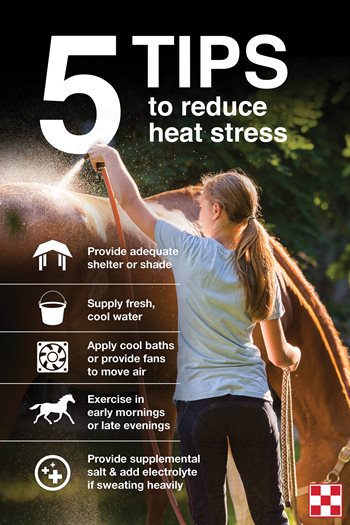
Here are a few tips to keep in mind when trying to keep your horses cool this summer.

1. Fresh, cool water

Hydration is critical during hot weather, but poor water quality can severely limit your horse’s intake. Most horses don’t like to drink hot water, so it is best to provide fresh, cool water daily. Dark-colored troughs or buckets placed in direct sunlight will absorb heat and warm the water quickly.

Keep horse water troughs and buckets clean and free of algae to encourage drinking. Remember, it can be hard to see accumulated algae and debris at the bottom of a dark-colored trough. Another tip: overfill water buckets and troughs to provide moisture for your horse’s hooves, especially in dry climates.

2. Salt and electrolyte supplementation

Feeds do not contain enough salt to meet a horse’s daily sodium requirement. Therefore, an additional source of salt is always recommended. At a minimum, a salt block should be available free choice. However, horses are not natural lickers and may not lick enough voluntarily. Top-dressing their feed with 2 oz plain salt per day is a good way to ensure they get enough.

In the “sweating season,” whether due to temperature or workload, salt should be switched to a quality electrolyte. This will supply important minerals like potassium and calcium, in addition to salt, that your horse loses through sweat. The best electrolytes will be mostly minerals, not sugar.

3. Summer horse shelter

We can all appreciate how much cooler it is under the shade tree in the middle of summer versus being out in the full sun, and your horse feels the same way. If there are no trees in your turnout areas, providing a run-in shed or even a fabric sunscreen as a horse shelter can make a big difference in helping to keep your horses cool.

Horses cool themselves primarily through evaporative and convective cooling. To help them, apply cool baths or use sprinklers to keep your horses more comfortable and to decrease their need to sweat as much. Moving air increases both convective and evaporative cooling. If the breeze isn’t blowing, provide a fan to move the air. Some farms even use large golf course fans to keep their horses cool in pastures. Finally, remember it may be more comfortable outside in the sun than inside a stuffy barn with poor airflow.

4. Exercise and heat stress in horses

Metabolic heat from exercise is another primary heat source for horses; therefore, it is best to confine strenuous exercise to early morning or later evening hours when ambient temperature and humidity are the lowest. Alternatively, you can give yourself and your horse a break from hard training during the hottest summer months.

To avoid additional heat stress, postpone events such as vaccination, weaning, changing barns, moving horses between groups, etc. If any of these events must occur during the hottest days of summer, try to do them during the coolest hours of the day.

Even though summer can be a sweaty, uncomfortable time, these tips can help your horse stay healthy and happy year-round.

Check out Kissimmee Valley Feed’s equine feed & supplements to help your horse stay happy!

Article source: Purina Animal Nutrition

Signs That Your Horse Has An Insect Problem

Saturday, June 1st, 2024

How to Tell if Your Horse Has an Insect ProblemSigns That Your Horse Has An Insect Problem: We’ve all had times where we wish our horses could talk and tell us what’s bothering them. The truth is, horses do communicate as best they can. It’s up to horse owners to pay attention to behaviors and physical signs to interpret what’s wrong. (And don’t forget to visit KVF for your horse supplies!)
You know fly season is in full swing when horses are reacting to flying pests. Stomping feet, swishing tails and shaking heads are all normal behavioral responses to flies and insects. Is there a pond or mud puddle available? Horses will often roll or stand in it in an effort to avoid flies.

But some horses also exhibit physical signs that insects are bothering them more than normal.

  • Is your horse’s hair falling out in clumps?
  • Does his mane have places where he’s rubbed out some or even all of the hair?
  • Does he vigorously scratch his tail on fence posts, stall walls or trees?
  • Are there places where his skin is irritated or even raw?

These are obvious signs your horse is having trouble with insects that shouldn’t be ignored.

When your horse acts “itchy”

It’s not unusual for a horse to use stationary objects, like a fence post, to scratch an occasional itch. But when a horse walks away from food to scratch or repeatedly rubs his ears, tail, mane, neck or belly to the point that his hair is falling out and his skin is raw–or even bleeding–there is a definite reason.

How can you know if your horse is actually allergic to insect bites, or if he just has irritated skin from being bitten?

“A horse with substantial hair loss or incessant itching likely needs to see a veterinarian who can do some diagnostic testing to nail down a cause,” notes Martha Mallicote, DVM, Dipl. ACVIM, veterinarian and large animal clinical assistant professor at the University of Florida.

“With skin disease, it’s very temping to label it as ‘not that important’ and just treat with over-the-counter ‘remedies.’ But the reality is that some horses with significant allergies need really aggressive therapy to improve their actual quality of life–not just the quality of their hair coat,” adds Mallicote.

She explains that there is not a definitive way to differentiate “itchy” from an actual sensitivity other than allergy testing, which would show any allergens that are affecting the horse. In such cases, your veterinarian’s expertise can get to the root of the problem and help your horse be more comfortable.

“A vet will complete a physical exam, including close inspection of the abnormal skin, and likely choose to take skin samples for culture, cytology or other testing,” says Mallicote.

Signs of insect allergies

Unfortunately, in addition to the aggravation factor, some horses are actually allergic to insect bites. Signs of substantial insect allergies include:

  • frequent itching to the point of destruction of fences and stall equipment from the horse’s rubbing
  • welts or swelling in the affected area
  • hair loss from intense rubbing due to itching
  • broken skin, sometimes to the point of bleeding

If your horse has intense itching and hair loss in specific areas, this can indicate an allergic reaction to specific pests known as culicoides.

“The classic distribution of hair loss for a culicoides-sensitive horse is the mane/neck, tail head and ventrum (belly) of the horse,” explains Mallicote.

Culicoides sensitivity

Tiny biting midges, sometimes described as “no-see-ums,” but properly identified as culicoides, can cause extreme distress by biting the horse’s mane, tail and belly, especially if the horse is allergic to the insect saliva. Affected horses will scratch themselves on almost any stationary object in an attempt to relieve the extreme itching.

Culicoides sensitivity may also be referred to as “sweet itch.” In addition to severe itching, it’s common for horses with this condition to have patches of skin with broken or missing hair, scaliness and even oozing lesions. Secondary infections are possible when the skin is broken.

“Culicoides sensitivity is quite common, especially in the Southeastern U.S., but most horses have a more manageable case of the disease,” says Mallicote. “There are certainly those horses that are especially sensitive and do develop those really severe signs that indicate they are so terribly itchy that they cannot stop scratching.”

For those horses, Mallicote says it’s important to minimize exposure to culicoides. These biting midges are most active around dusk, so protecting horses that are sensitive typically means stabling them at this time of day and using fans that create a strong enough air current to keep midges from landing on the horse and biting.

Veterinarians treating such horses may have to prescribe strong anti-inflammatory medication to help get the itch under control.

Be proactive

If your horse has had issues in the past and reacted to insect bites by rubbing his mane and tail until his hair is falling out, you’ll want to take proactive steps before he’s under assault again.

“Get started with fly spray early in the season. Apply an effective product at least once daily and make sure to use enough product to really cover the horse,” advises Mallicote.

Farnam’s Endure Sweat-Resistant Fly Spray for Horses is an effective choice for hard-working horses that will be sweating, while Nature’s Defense Water-Based Fly Repellent Spray is a non-chemical, botanical-based option that also offers great protection.

Read all the directions on the spray bottle to be certain you are applying the correct amount. Use the product as recommended. Many horse owners inadvertently don’t apply enough insect repellent to perform as the product label promotes.

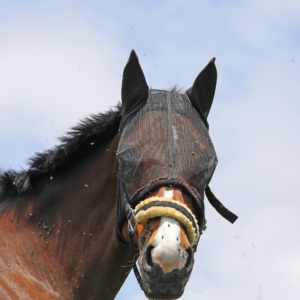
Physical barriers–such as Farnam’s SuperMask II Horse Fly Mask, boots and sheets–may be needed for those horses that are overly sensitive to insects. For pastured horses, spot-on repellent products may also be beneficial.

“As for some situations, long-acting products are also helpful. Not in place of the fly spray but in addition to it,” adds Mallicote. “For sensitive horses, start using fly sheets and fly masks before they are needed to minimize exposure.”

Mallicote reminds owners that these horses will benefit from being stalled with a strong fan. Especially during the time of day when pests are most active.

Keep an eye on your horse’s behavior and watch for physical signs that indicate insect irritation or possible allergy. This way, your horse won’t have to “shout” to get your attention if he’s suffering from pests.

Farnam, Cynthia McFarland


Navigation


Share this page

Calendar

January 2025
February 2025
No event found!

Quick Info


Main Store
1501 Eastern Ave map

Saint Cloud, FL 34769..

Contact Info

Phone: 407-957-4100
Fax: 407-957-0450

Store Hours

Mon-Fri: 8:00 am - 6:00 pm
Sat: 8:00 am - 2:00 pm
Sunday Closed


Second Store
215 13th Street

St. Cloud, FL 34769

Contact Info

Phone: 407-892-4040

Store Hours

Mon-Fri: 9:00 am - 7:00 pm
Sat: 9:00 am - 5:00 pm
Sunday: Closed