Archive for the ‘Chickens’ Category

2-3 Week Old Chicks

Sunday, January 20th, 2019

2-3 Week Old Chicks

With a clean brooder, fresh feed and clean water, your chicks are settled in and off to a good start by weeks two and three. 

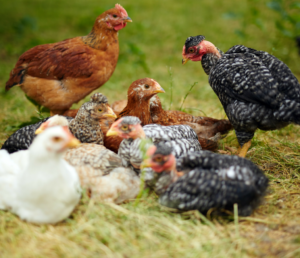
It’s time to enjoy them. Chicks are very social and will provide hours of entertainment. You will see their unique personalities emerge as each day goes by and they will grow into mature chickens before you know it.

Now, listen to them.  Chicks will emit a soft cheeping sound when everything is right in their world. This sound can be used as a means of determining their comfort status. A chick that is stressed due to conditions being too hot or cold, wet litter, or one that is hungry or thirsty will have a shrill or higher pitched cheep or may cheep very rapidly. Translate this as a call for help and look for the problem.

Things to do for your chicks this week
  • The brooder temperature should be reduced to 85°F (lower 5° each week to a minimum of 65°F).
  • Chicks should be exposed to at least 10 hours of light per day after the first week.
  • Brooder guard can be removed now if it hasn’t been already. Chicks should be able to find the heat source by this time.
  • After the brooder guard is taken out, the feeders and waterers can be moved further away from the source of heat. As the chicks become more active and continue to grow, this will give them more space for exercise and will help keep the feeders and waterers cleaner and keep them from being heated by the heat lamp.
  • Any paper or pans used to feed should be taken out if you are sure chicks are eating from the feeders. The level of feed in the feeders can be decreased a little each week until they are half full at all times. This will help reduce the amount of feed waste.
Tips to grow on
  • Keep checking on chicks to make sure they are comfortable. Again, chick behavior is the best measure of the ideal brooder temperature.
  • Continue to provide unlimited feed and water at all times.
  • Clean and refill waterers daily.
  • Remember, good sanitation is critical to avoid health problems when caring for young chicks. Keep litter dry by removing wet and soiled litter and replacing it with clean, dry litter.
  • Always store feed in a well-ventilated, dry area that is insect and rodent free.
Looking ahead

A complete and balanced feed will provide all the nutrition your chicks need to grow into healthy, productive birds. Feeding extra grains or scraps to your chicks can reduce the amount of complete feed they eat and may prevent them from getting all the nutrients they need to grow and develop properly.

One of the most common and deadly diseases in chicks is coccidiosis. Caused by a parasite, it is spread through the droppings of infected birds. Coccidia love damp, warm environments so wet litter and unsanitary brooder conditions are a prime breeding ground for this parasite. Most birds will come into contact with coccidia at some time but appear to be most susceptible to the disease between 3 to 5 weeks of age. If chicks are healthy and live in a dry, clean, well-managed environment, they are often able to fight it off or may only get a mild case, which can even go undetected. Symptoms of coccidiosis can include diarrhea or bloody diarrhea, weight loss, no desire to eat, ruffled feathers and an overall sickly appearance. If you suspect coccidiosis, seek treatment immediately. Commercial vaccines and medicated feeds are available to prevent coccidiosis. However, the ideal prevention for this disease is maintaining a dry, sanitary, stress free environment through good management.

If you suspect disease or some other serious health problem in your flock, contact your veterinarian for diagnosis and treatment options.

Article Attributed to Purina Animal Nutrition

Welcoming Home Your New Chicks

Saturday, December 29th, 2018

After bringing your chicks home, focus on three core elements: warmth, water and feed.

Watch Dr. Mikelle Roeder, Purina poultry nutrition expert, walk new chicken owners through what to do with their chicks once they arrive home.

You can get your chicks from your local Purina retailer, directly order from a hatchery, or if you’re feeling extra ambitious you can try incubating fertile eggs at home. Before your chicks arrive, you should have a few things prepared. You’ll need a brooder, either homemade or store-bought. You can make a brooder out of anything, from a large cardboard box, large plastic tote or even an old empty stock tank works well.

Once you have your day-old chicks, introduce them to the brooder. As you place them into their new digs, dip their beaks in the water to teach them how to drink. Watch your chicks closely for the first couple of days to make sure they adjust to their new home.

If you don’t have a thermometer or a way to monitor brooder temperature, you can judge the temperature by the behavior of the chicks themselves. If they all converge beneath the light in a tight group, they’re too cold. If they form a ring around the light, it’s too hot. Raise or lower the lamp until the chicks are evenly dispersed.

Your chicks will undoubtedly make a mess and keeping the brooder clean is a top priority when it comes to the health of your growing flock. You’ll need to clean and refill waterers daily, as many parasites and diseases can spread quickly through contaminated water. Wash waterers and feeders with a mild dish detergent and sterilize with a mixture of one part bleach to nine parts water. To keep your chicks clean and dry, line the bottom of your brooder with dry pine shavings. Chicks are messy drinkers so they depend on the shavings to absorb excess moisture in the brooder. At least once per week you should temporarily remove your chicks from the brooder and give it a thorough cleaning, again using the bleach solution.

Since chicks can’t regulate their own body temperature until they’re fully feathered, it’s important that the brooder have a source of warmth. A heat lamp is the most common source of heat for the homesteader raising chicks, but there are many devices on the market such as infrared heaters that do a fine job of keeping the chicks warm. Whatever you choose, the starting temperature for new chicks should be between 90 and 95 degrees. As the chicks grow, you can raise the lamp to reduce the temperature by about 5 degrees each week until they are fully feathered.

Your new chicks will need a steady supply of feed and water. A chick-sized feeder and waterer help keep the chicks out of their feed and water and help prevent contamination. It also keeps them from wasting feed by scratching at it.

A complete feed is needed to support the fast growth of new chicks. Pick up a bag of chick starter, containing at least 18% protein such as Purina Start & Grow Poultry Feed or 20% diet like Purina Flock Raiser Poultry Feed for meat birds.
Its never too early to start preparing your coop, run, or outdoor space for your birds. By the time they’re four to six weeks old your chickens will be ready to start exploring, and will need a larger space.

Space requirements for chickens depend on the size of the breed. For the most flexibility going forward, you can implement what I call the four-ten rule, at least four square feet of floor area per bird inside the coop, and ten square feet of outdoor space per bird. Offering even more space, either indoors, outdoors, or both, will significantly decrease future problems with bullying, egg-eating, and health issues.

If you’re preparing to raise egg-layers, you’ll also need to make sure that your coop has nesting boxes for your hens. One nest for every four to five hens should be adequate. Boxes shouldn’t be too roomy. A good size is one cubic foot. You can construct your boxes from wood, metal, or plastic, and you’ll want to consider adding a landing board in front of the box to help the hens get in and out of it.

Finally, your chickens will need a place to roost. Roosts can be made from any natural material. 2×4’s or sturdy branches can be screwed into place to give each bird a place to perch. If you use lumber for roosts, round the corners with a router or plane. It’ll be much easier on your birds’ feet, and you’ll avoid health issues over the longterm. Each bird should get about nine inches of roost space, and each roost should be separated by about a foot.

I’m sure you’ll have more questions as your birds grow and prepare for their first eggs. Be sure to reach out to your local Purina retailer. Their poultry specialists can help address your questions along the way. Visit grit.com for even more great tips, and don’t forget to sign up for coupons and e-tips from Purina as your birds grow. Visit purinachickdays.com today.

Article and Video Attributed to Purina Animal Nutrition

Preparing for Backyard Chicks

Sunday, July 22nd, 2018

Preparing for Backyard ChicksRaising chickens is a great experience for the whole family. 

One of the primary requirements is providing housing that is comfortable for your backyard flock. Young chicks can be raised in a variety of structures, but the area should be warm, dry and ventilated, but not drafty. Also make sure it is easy to clean.

Warming
Small numbers of chicks can be warmed adequately with heat lamps placed about 20 inches above the litter surface.

Bigger groups of birds in a large room, such as a shed or a garage, should have a supplemental heat source such as a brooder stove.

Before you bring them home
Several days in advance, thoroughly clean and disinfect the brooder house and any equipment the chicks will use. Doing this in advance will allow everything to dry completely. Dampness is a mortal enemy to chicks, resulting in chilling and encouraging disease such as coccidiosis (parasite infection).

When the premises are dry, place 4 to 6 inches of dry litter material (wood shavings or a commercial litter) on the floor.

Feeders and Waterers
It’s important to ensure your chicks have access to fresh feed and water. Positioning the feeders and waterers along the edges of the comfort zone will:

  • Keep the water and feed from being overheated
  • Help keep water and feed cleaner (chicks milling and sleeping under the warmth source often scatter bedding and feces)
  • Encourage the chicks to move around and get exercise

Be sure to have plenty of fresh feed and water when the chicks arrive:

  • At least two 1-quart or one 1-gallon waterer for every 25 to 50 chicks
  • Dip the beaks of several chicks into the water to help them locate it. These chicks will teach the rest.

Feeders

  • Day 1: Use clean egg flats, shallow pans or simple squares of paper with small piles of feed on them.
  • Day 2: Add proper feeders to the pens.
  • A few days later: Remove the messy papers, pans or egg flats once chicks have learned to eat from the feeders.

Waterers

  • Should be emptied, scrubbed, rinsed and refilled daily
  • Wet litter around waterers should be removed as often as possible. Dampness encourages disease and parasite transmission. The drier the premises, the healthier and happier the chicks.
  • At about 4 weeks of age, ducks and geese will appreciate a swimming area, but you will need to keep the wet litter cleaned up.
  • In winter months, you may need to purchase a water heater to prevent water from freezing.

As chicks grow

  • Feeders and waterers can be moved outward from the heat source, expanding their area of activity and helping keep the feeders and waterers clean.
  • As the birds grow, the feeders and waterers should be adjusted to the height of the back of a standing bird. This will help decrease contamination and minimize wastage

Feeding your chicks
It is important to select a complete feed that gives your chicks all the nutrition they need to grow into healthy hens. Once they’ve reached maturity,a high-quality complete layer feed will help to maximize egg production and quality. If they are broiler chicks, choose a feed designed to support their more rapid growth. Layer chicks will reach egg-laying age at about 18 to 20 weeks; broiler chicks will reach market weight at 8 to 10 weeks.

You may also consider occasional supplements to their diet, such as table scraps, scratch grains, oyster shell and grit. However, supplemental feeds should make up no more than 10 percent of a hen’s diet.

Purina offers a complete line of poultry feeds appropriate for each bird in your flock.

Lighting and heating for your chicks
A thermometer should be placed at the chicks’ level to accurately gauge temperature.

  • Adjust the brooder stove and/or heat lamps 24 hours in advance so that upon the chicks’ arrival, you’ve created a comfort zone that is 90º F at “chick level.”
  • For turkey chicks, the comfort zone should be 100º F.
  • Use a brooder guard (a plastic, cardboard or wire barrier) for a few days to encircle the brooding area so that the chicks don’t wander too far from the warmth.
  • Once chicks have learned where the heat is, remove or expand the guard. This will allow the chicks to escape the heat if necessary. Getting overheated can be as dangerous as getting chilled.
  • Chicks that huddle under the lamp are too cold. Chicks that sprawl along the brooder guard are too hot. Chicks happily milling around all portions of the brooder area are comfortable.
  • The temperature can be gradually reduced by 5º F per week to a minimum of 55º F.

Even after your chicks have grown into hens, keep a standard old-fashioned 40-watt incandescent light bulb handy; or, if you’re using the new energy-efficient bulbs, a 28-watt halogen, 10-watt compact fluorescent, or 8-watt LED bulb, to maintain the artificial light necessary for egg laying to continue through the winter months.

Article Attributed to Purina Animal Nutrition

Purina Oyster Strong™ System

Thursday, November 16th, 2017

Purina® Layena® and Layena® Plus Omega-3 chicken feed include our exclusive Oyster Strong™ System for strong shells and fresh eggs
No Need to Supplement: It’s All in the Bag

Calcium is the number one nutrient for laying hens. For years, there has been only one way to provide this key nutrient: by supplementing layer feed with oyster shells.

Now, Purina® Layena® and Layena® Plus Omega-3 layer feeds include Oyster Strong™ System, an exclusive blend of oyster shell and key vitamins and minerals, like vitamin D and manganese, ensuring a supply of calcium will be available at night when your hens are forming eggs.

Our exclusive Oyster Strong™ System eliminates the need to supplement as all the necessary calcium is included in every bite of our complete layer feed.

https://youtu.be/P0j_5D1WOEM

What is Purina’s Oyster Strong™ System?
Purina’s Oyster Strong™ System is a blend of oyster shell and key vitamins and minerals, like vitamin D and manganese. This combination includes large particles that break down slowly, ensuring that hens receive a supply of calcium at night when they need it most. This slow-release calcium is important for strong shells and healthy hens. It’s included exclusively in Purina® Layena® and Layena® Plus Omega-3 layer feeds.

How does Purina’s Oyster Strong™ System work?
Oyster Strong™ System is made up of larger particle size oyster shell. The large particles break down over time and release calcium slowly.

Here’s why slow-release calcium is important:

– Each eggshell includes about 2 grams of calcium. To form each eggshell, hens must consume about 4 grams of calcium per day through their feed.
– It takes approximately 20 hours for a hen to make an eggshell. Because of this timeframe, much of the work is done overnight – long after the hen has eaten.
– If only a quick-release calcium is provided, the hen would digest it very quickly, leaving a void for the additional calcium she needs while she sleeps.
– If a hen does not have the necessary calcium, she may pull the nutrient from her bones which can cause a weak skeletal structure.
Through the entire egg formation process, hens incorporate nutrients from their feed into the egg and shell. Offering a complete layer feed that includes Purina’s exclusive Oyster Strong™ System, like Layena® or Layena® Plus Omega-3 layer feed, helps you provide all the nutrients your hens need for nutritious eggs, protected by strong shells.

Do I need to supplement my layer feed with oyster shells?
If you are feeding your hens a diet consisting of 90% Purina® Layena® or Layena® Plus Omega-3 layer feed with Oyster Strong™ System, you should not need to supplement with oyster shells. The added calcium is included right in the feed.

Can I feed eggshells to my hens for added calcium?
You can provide egg shells to your hens as a calcium source. Just be aware that there could be some issues with this approach.

– The calcium in eggshells is not as available to the hen as it is from oyster shell and it may break down quicker than the slow-release calcium in Oyster Strong™ System.
– Your birds will need to eat more eggshells to get the same amount of calcium as from oyster shell.
– You could be teaching your birds that eating eggshells is okay, which could lead them to start eating the eggs that they are laying.
– If you decide to offer eggshells, be sure to dry and clean the eggshells prior to giving them to your birds. You could be feeding the hens bacteria that you do not want them to have and could potentially make them sick.

Remember that Oyster Strong™ System is incorporated into both Purina® Layena® and Layena® Plus Omega-3. In most cases, you should not need to supplement oyster shell when you are feeding a complete layer feed that includes Oyster Strong™ System.

When should I start feeding layer feed to my birds?
Start feeding a complete layer feed to your hens when they turn 18 weeks old or when you see the first egg, whichever comes first. Eighteen weeks is the age when most egg-laying breeds are considered adults. Most excitingly, it’s the time when many breeds will lay their first egg. To produce eggs, hens require different nutrients from when they were growing; therefore, at this key milestone, you can start switching your chickens to layer feed.

After choosing a complete layer feed for your flock, it is important to make the transition over time to prevent digestive upset.

For the backyard birds on our farm in Missouri, we have found it’s best to make the transition over time rather than all at once. We mix the starter and layer feed evenly for four or five days. If birds are used to crumbles, start with a crumble layer feed. The same goes with pellets. The more similar the two feeds are, the more smoothly the transition will go.

Many hens will eat the mixed feed without noticing a difference. When hens are eating both feeds, flock owners can stop feeding the starter feed and make the complete switch to all layer feed. It is important to give your birds enough time to adjust to the new diet. Most birds will adjust within a couple of weeks but some can take a month or longer to fully transition to their new diet.

Navigation


Share this page

Calendar

January 2025
February 2025
No event found!

Quick Info


Main Store
1501 Eastern Ave map

Saint Cloud, FL 34769..

Contact Info

Phone: 407-957-4100
Fax: 407-957-0450

Store Hours

Mon-Fri: 8:00 am - 6:00 pm
Sat: 8:00 am - 2:00 pm
Sunday Closed


Second Store
215 13th Street

St. Cloud, FL 34769

Contact Info

Phone: 407-892-4040

Store Hours

Mon-Fri: 9:00 am - 7:00 pm
Sat: 9:00 am - 5:00 pm
Sunday: Closed